If you are like me who is always trying different linux builds for Raspberry Pi or keeps messing up with Kodis configurations, this post is for your. I will teach you to make an perfect image of your SD Card so that you can simply go back to the last image, without having to install everything again from scratch.
If you don’t know how to install any linux distribution for RPi, I suggest you to follow this guide HERE
Backup
- First thing after you insert the SD Card in your computer is to check what is the device’s location. Open a terminal, then run:
diskutil list
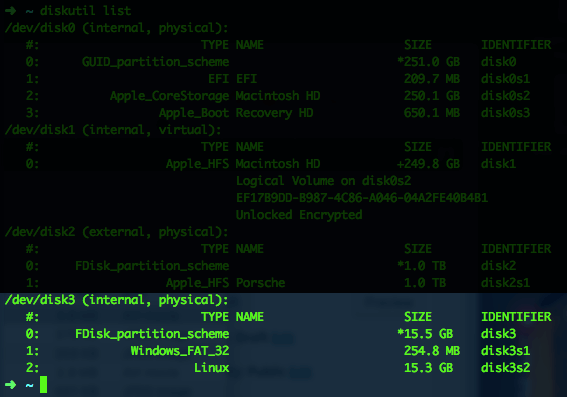
In my case, the SD card is in /dev/disk3. Remember that you are looking for the disk (not partition) of your SD card, so it would be disk4, not disk3s1.
-
Unmount your SD card by using the disk identifier:
diskutil unmountDisk /dev/disk(disk# from diskutil)
for example, in my case:
diskutil unmountDisk /dev/disk3
- Clone your SD Card to a file on your computer by using the following command:
sudo dd if=/dev/disk(disk#) of=my_rpi_backup_image.img bs=4m
you can change my_rpi_backup_image.img to any other desired name you want. Also the above process can take a few minutes to complete.
- Now you can store your backup file anywhere you want for further restore.

Restore
- Follow the first two steps described above and make sure you have the disk unmounted.
- We can restore our backed up file to the SD Card, go to the folder where the image file is located and run on the terminal:
sudo dd if=my_rpi_backup_image.img of=/dev/disk(disk#) bs=4m
Same as before, this process can take a few minutes to complete, so you can go have some coffee while your computer finishes the job.
Once it’s done, simply remove the SD Card from your computer, insert it to your RPi and turn it on, it will boot with the system the exact same way as it was before you saved it.