Automating screenshot sharing on Windows
Table of Contents
Introduction #
One thing that I really liked about mac was how easy it was to generate a screenshot from my screen and share with people. Now that I am pretty much a full-time windows user (besides all the time I spend on a Linux terminal), I needed to find an easy and fast way to share screenshots. And that is where Greenshot comes in handy!
The Plan #
A keyboard shortcut to select a region of my screen, automatically generate the image, upload it to my server on a specific FTP folder (can also be done with rsync) and copy the shareable URL to the clipboard.
Steps to Automate Screenshot Sharing #
Step 1: Download Greenshot #
Download Greenshot at http://getgreenshot.org/downloads/ and install it.
Step 2: Download and Install NCFTP #
Download and install NCFTP from http://www.ncftp.com/download/ (NcFTP Client 3.2.6 for Microsoft Windows). After installing it, the ncftp executable files are going to reside on C:\Windows.
Step 3: Create a .bat File #
Create a .bat file with the automating code below (changing yourdomain, ftp user and password).
Step 4: Configure Greenshot #
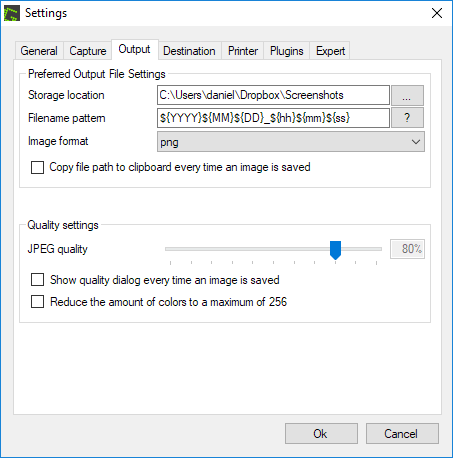
Change the path where you save your screenshots on your computer, but the important thing is to change the “Filename pattern” to:
${YYYY}${MM}${DD}_${hh}${mm}${ss}
and uncheck “Copy file path to clipboard every time an image is saved”, this part is important!

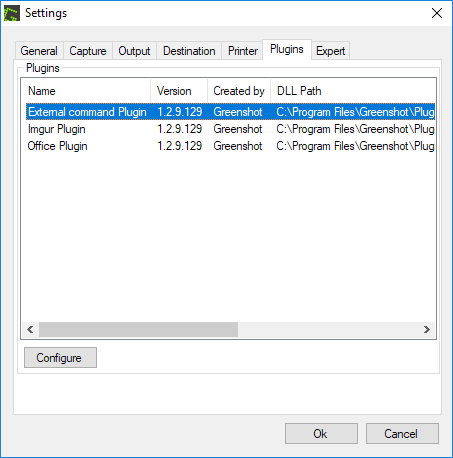
Go to Plugins tab, click in “External command Plugin” and “Configure”.

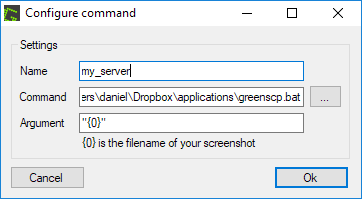
Create a name for your automation. On command, link to the .bat file you created and make sure the “Argument” is
"{0}"

Done, now whenever you take a screenshot, it will automatically upload to your server and copy the URL to the clipboard automatically, making it super fast and easy to share anything on your screen 🙂