Line Follower Robot with OpAmps
Table of Contents
Introduction #
This is an old project that I found on my computer and decided to share with you guys. It’s that famous line following robot, made the simplest way possible, using only basic components such as LM358 OpAmp, LDR, Resistors and Transistors.
Components #
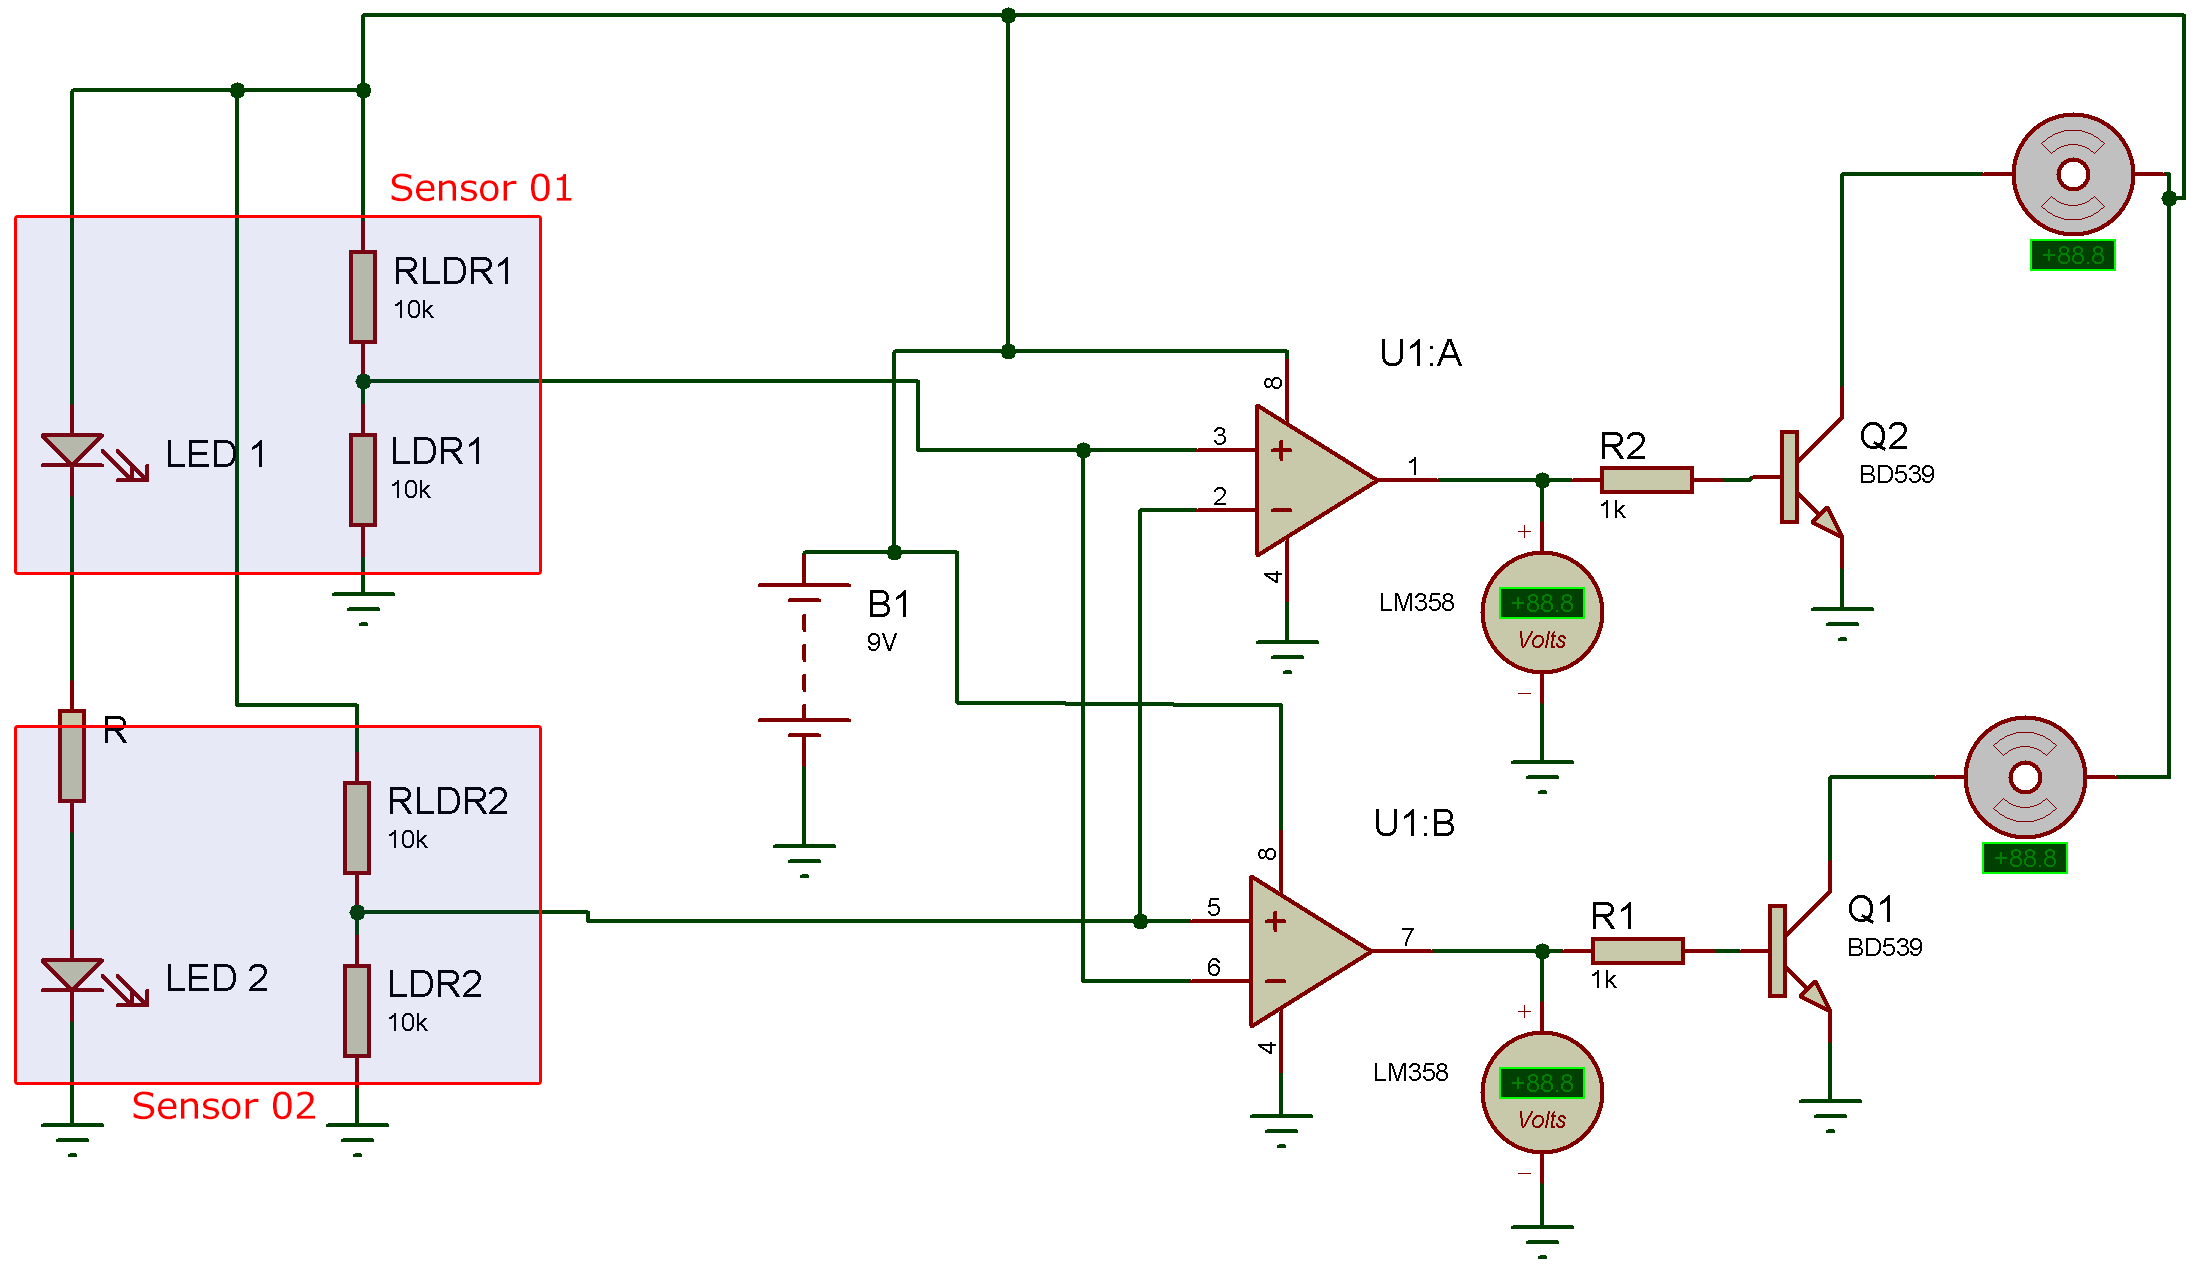
The LM358 OpAmp comes with two Operational Amplifiers and I used it as a comparator to make the robot stay on the right path.
Operation #
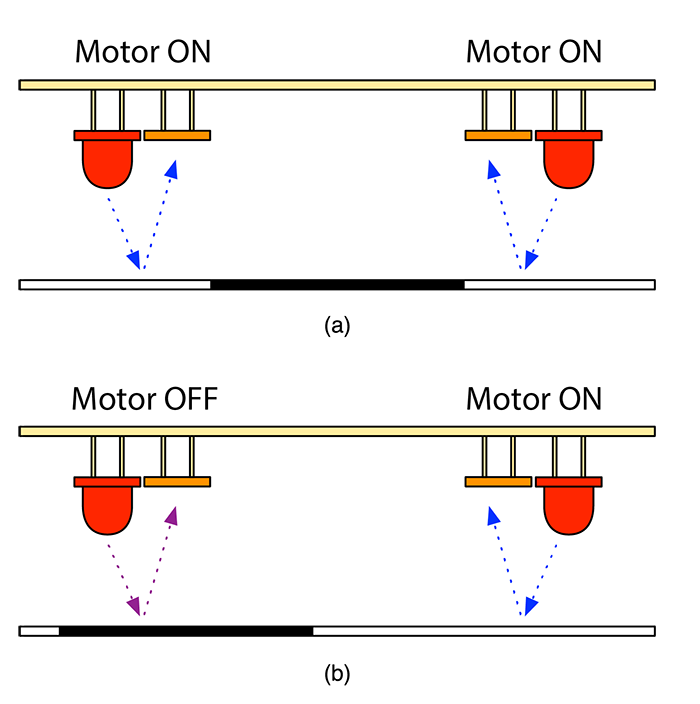
I attached two bright red LEDs and two LDRs in the front of the car to detect if the robot is going in the right direction or not. When the car is going straight, the light from both LEDs will reflect on the white surface, therefore the LDR’s resistance will be the same and both motors will rotate at the same speed. When one of the LEDs goes over the black line, one motor will stop while the opposite will keep going, fixing the robot’s position. The picture below demonstrates this idea:
PCB and Simulation #
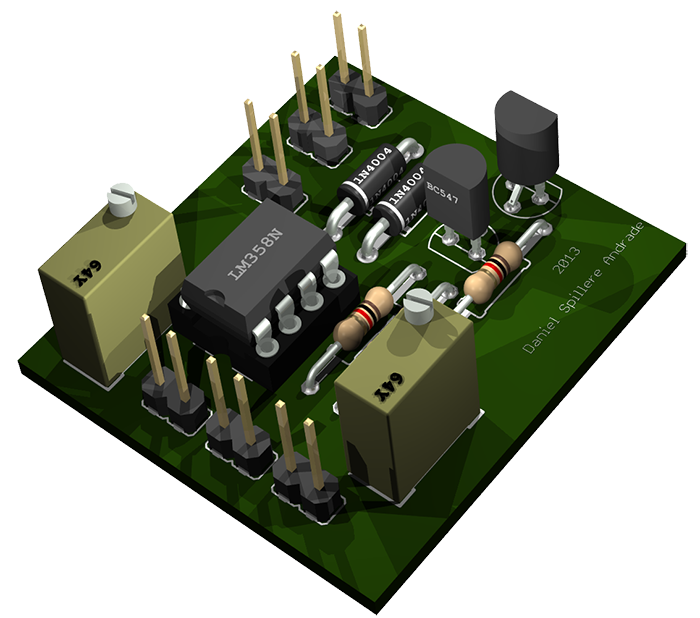
The PCB was developed using EagleCad, you can download the files HERE. The simulation was done using Proteus ISIS.
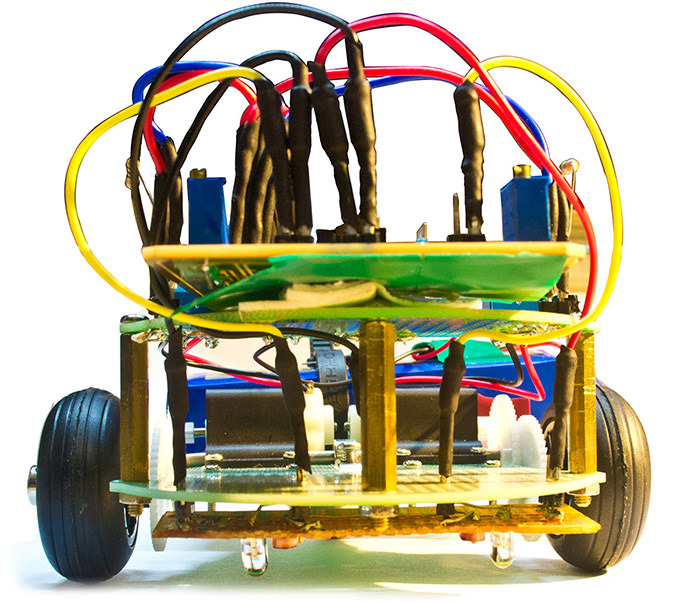
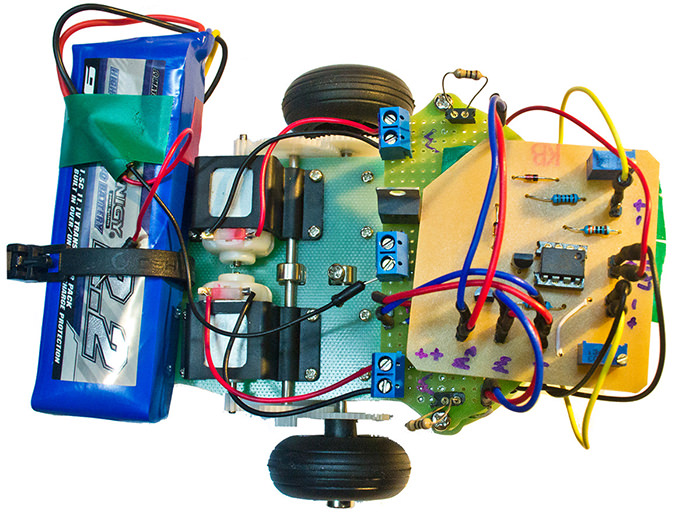
Chassis and Battery #
The chassis and the battery were bought from Hobby King. Below are pictures of the assembled car and PCB.
Improvements #
There are many ways to improve this project, for example using a microcontroller or adding a few more OpAmps for a smoother control using PID.
For a better explanation about this project, you can check the written project here (it’s in Portuguese).